Windows#
To install LabGym on Windows, you will need to access the terminal. To do this,
open the start menu by clicking the Win key, type “PowerShell”, and hit
enter. All terminal commands going forward should be entered in this terminal.
Install Git.
If you’re unsure of which installation method to use, select the
64-bit Git for Windows Setupoption. Run the installer, and accept all default values.Install the Visual Studio C++ Build Tools.
Scroll down to the entry that says
Build Tools for Visual Studio 2022and click “Download”.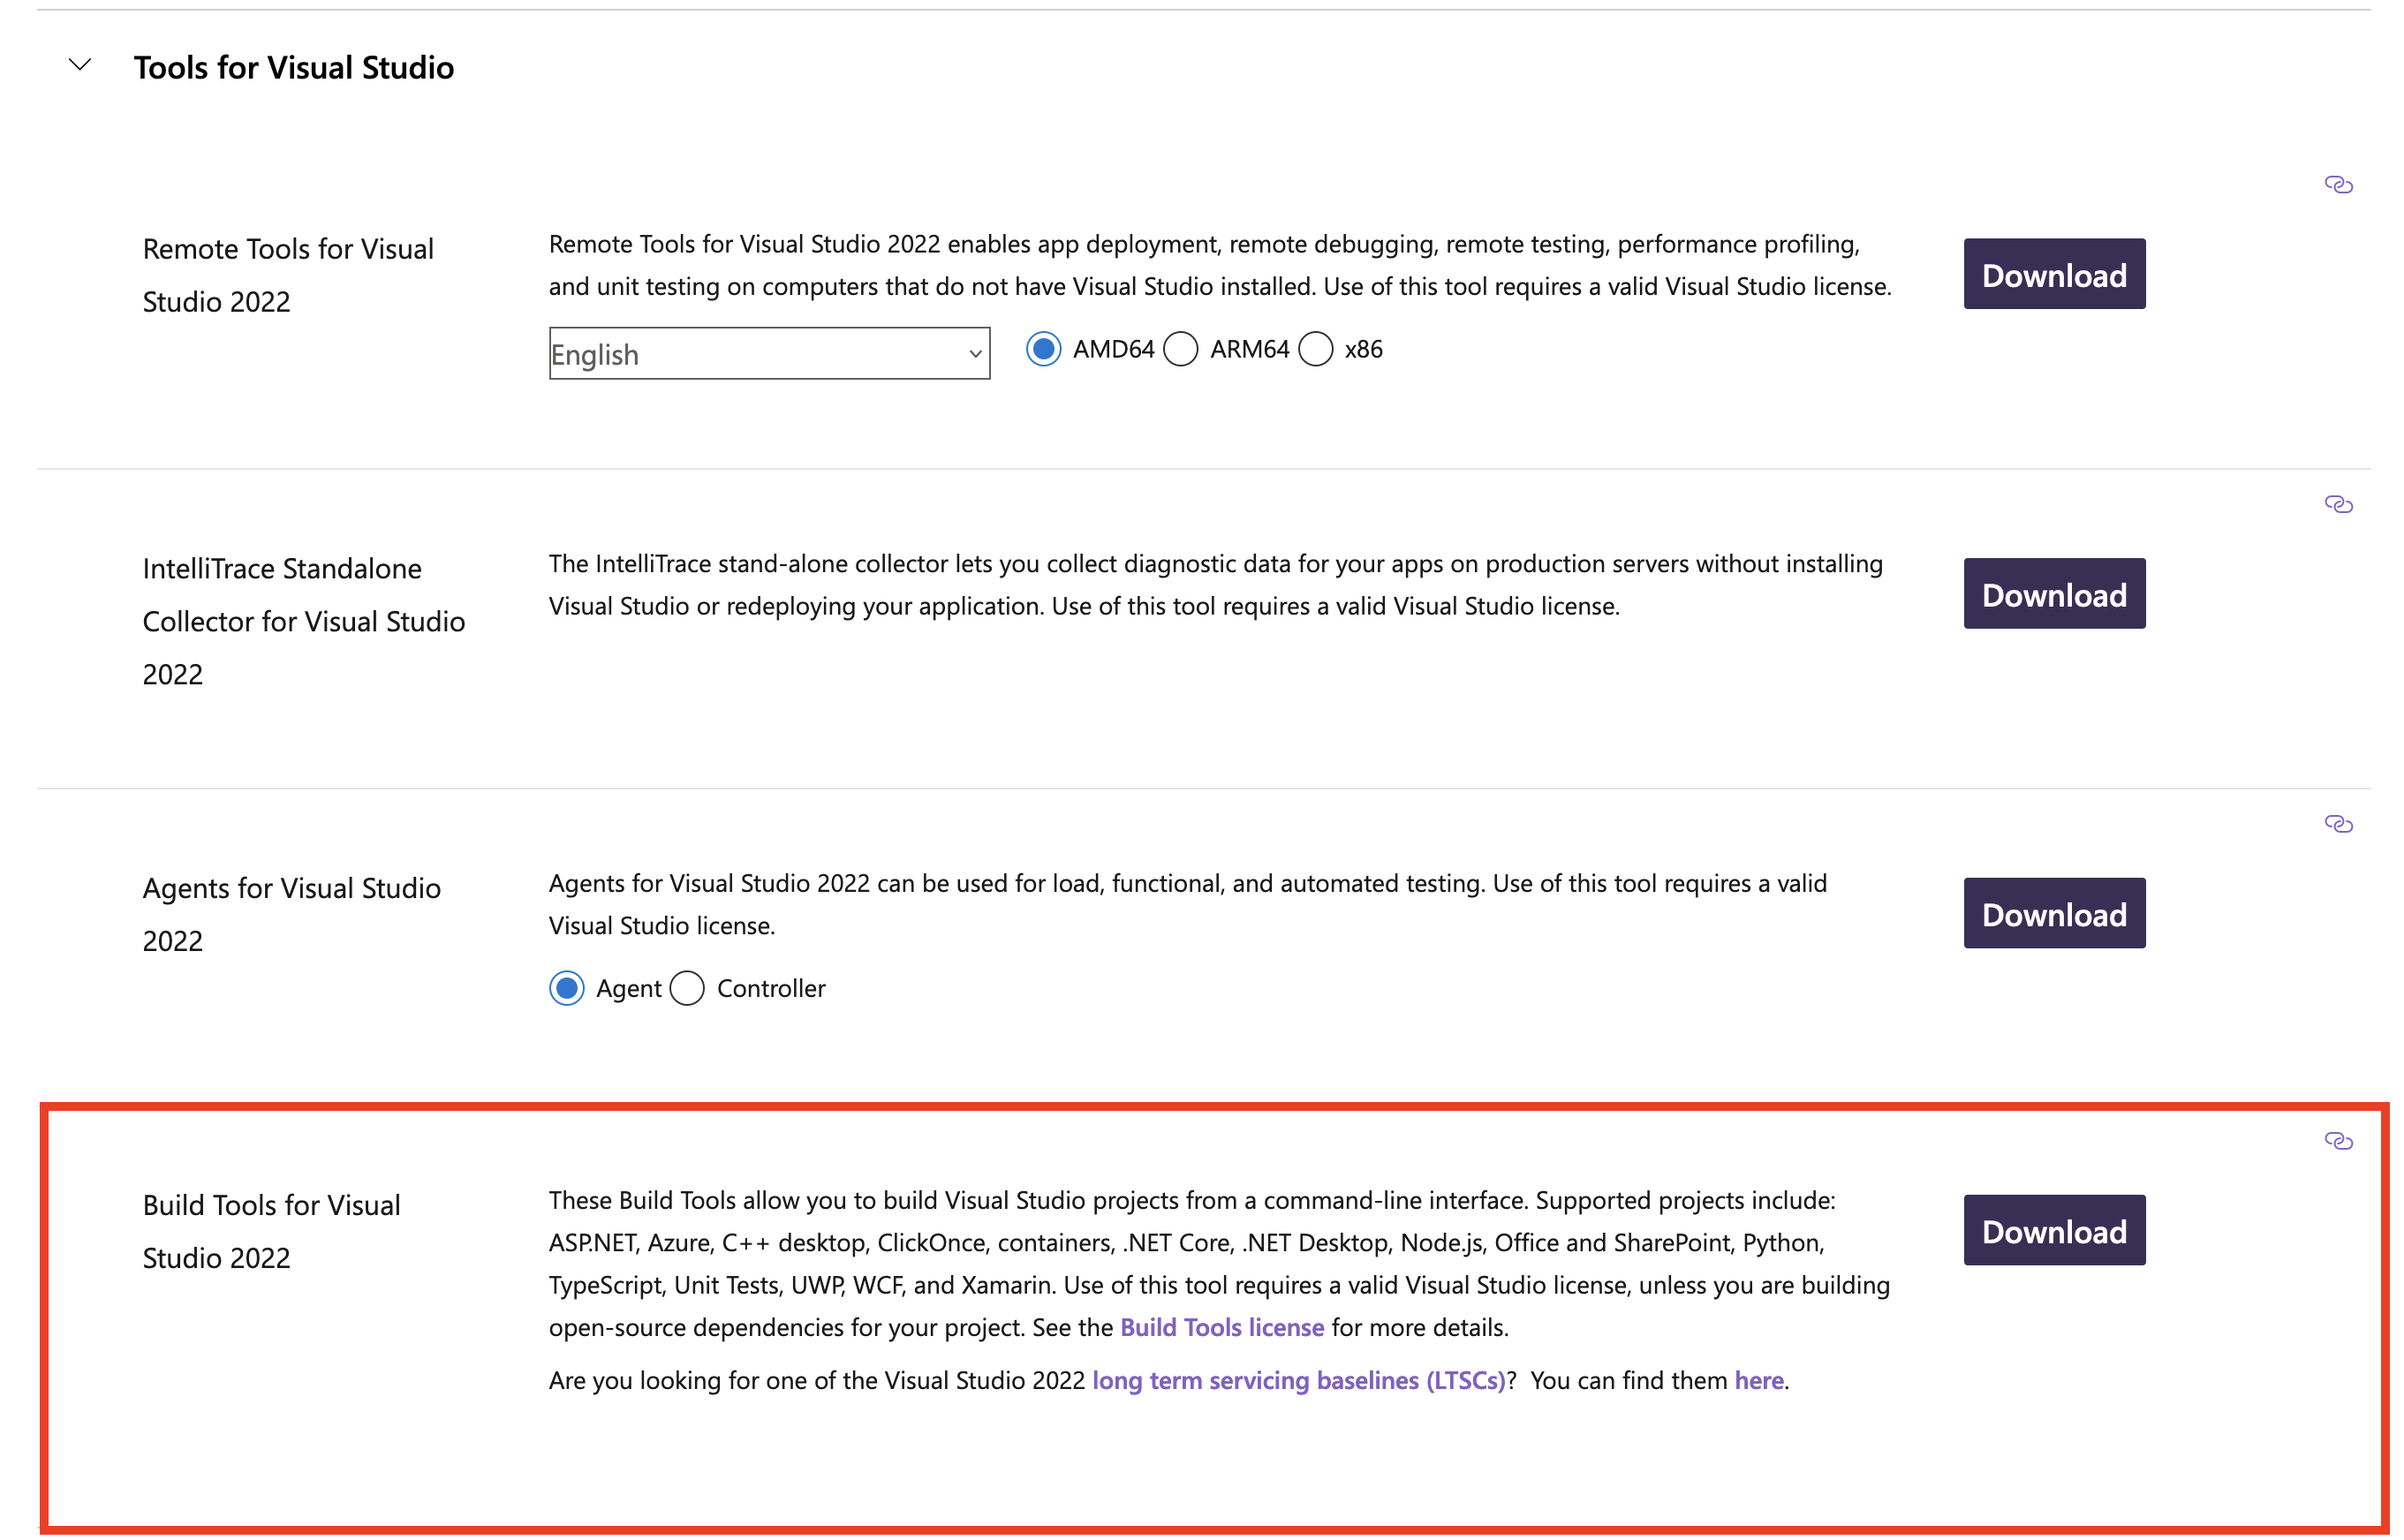
When you run the downloaded executable, you will be prompted to choose what tools you will need. Select only the
Desktop Development With C++workload, then click “Install”.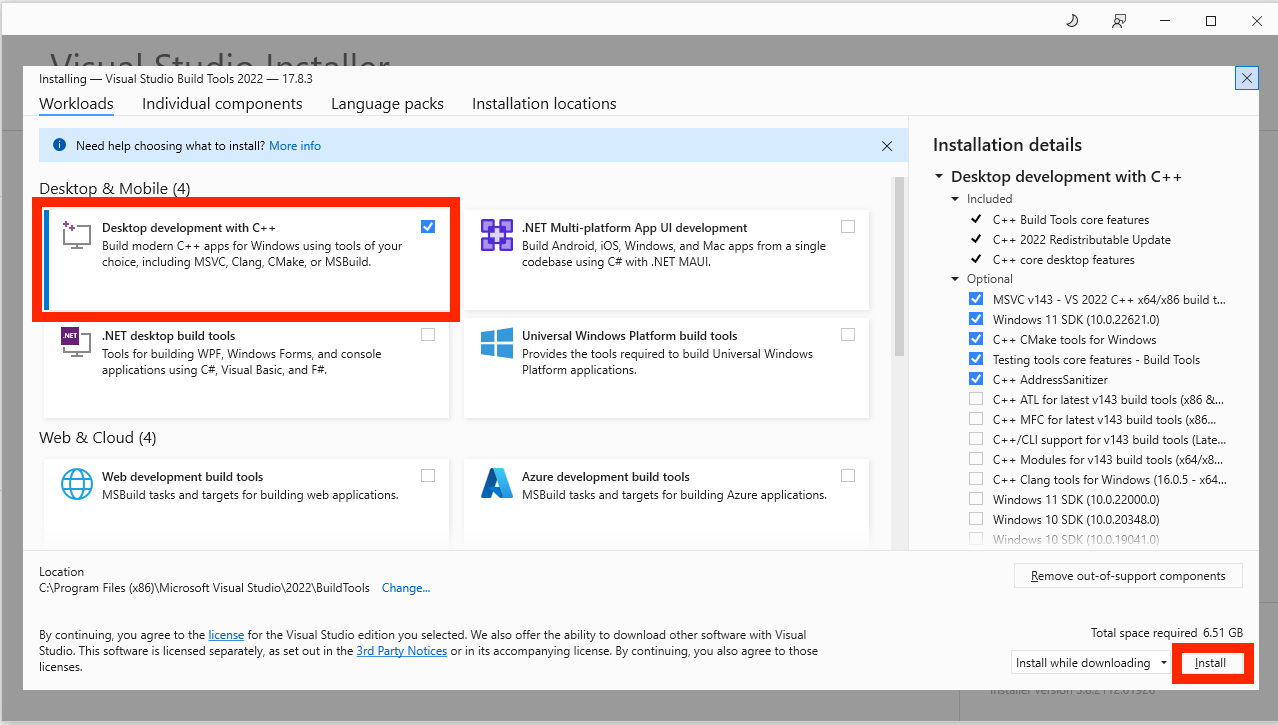
Install Python 3.10. Scroll down to the bottom and click the
Windows installer (64-bit)option. Run the installer and select “Add python to path” and “Disable long path limit”.To test your Python installation, run the following command. If the version number prints out successfully, your Python installation is working.
> py -3.10 --version
Python 3.10.10
If you’re using an NVIDIA GPU, install CUDA Toolkit 11.8 and cuDNN.
First, install and/or update your GPU drivers at this link. Select your GPU model and click “Search”, then click “Download”. After installing the drivers, reboot your system to ensure they take effect.
Then, install CUDA Toolkit 11.8. Select your version of Windows, select “exe (local),” then click “Download.”
Warning
If you’re using Windows Subsystem for Linux (WSL), please refer to the Linux install instructions.
To verify your installation of CUDA, use the following command.
> set CUDA_HOME=%CUDA_HOME_V11_8%
> nvcc --version
nvcc: NVIDIA (R) Cuda compiler driver
Copyright (c) 2005-2022 NVIDIA Corporation
Built on Wed_Sep_21_10:41:10_Pacific_Daylight_Time_2022
Cuda compilation tools, release 11.8, V11.8.89
Build cuda_11.8.r11.8/compiler.31833905_0
Finally, install cuDNN. You will need to register an Nvidia Developer account, which you can do for free. You can choose cuDNN v8.9.7 that supports CUDA toolkit v11.8. Choose ‘Local Installer for Windows (Zip)’, download and extract it. And then copy the three folders ‘bin’, ‘lib’, and ‘include’ into where the CUDA toolkit is installed (typcially, ‘C:\Program Files\NVIDIA GPU Computing Toolkit\CUDA\v11.8’), and replace all the three folders with the same names. After that, you may need to add the ‘C:\Program Files\NVIDIA GPU Computing Toolkit\CUDA\v11.8’ to path via environmental variables.
Important
If you’re using Windows 11, when installing cuDNN, select “Tarball” then “11” under CUDA Version. Then, follow these instructions to install cuDNN from the
.tar.gzfile.Upgrade
pip,wheel,setuptools.> py -3.10 -m pip install --upgrade pip wheel setuptools
Install LabGym via
pip.> py -3.10 -m pip install LabGym
If you want to use LabGym Detector function:
7.1. Install Detectron2.
> py -3.10 -m pip install git+https://github.com/facebookresearch/detectron2.git
7.2. Install PyTorch v2.0.1 with CUDA v11.8.
> py -3.10 -m pip install torch==2.0.1 torchvision==0.15.2 torchaudio==2.0.2 --index-url https://download.pytorch.org/whl/cu118
If you are using LabGym without a GPU, use the following command instead.
> py -3.10 -m pip install torch==2.0.1 torchvision==0.15.2 torchaudio==2.0.2 --index-url https://download.pytorch.org/whl/cpu
Launch LabGym:
> LabGym
The GUI will take a few minutes to start up during the first launch. If the LabGym GUI shows up, you have successfully installed LabGym!
If this doesn’t work, which typically is because the python3/script is not in your environment path. You can google ‘add python3 script to path in environmental variable in windows’ to add it to path, or simply use the following commands to initiate LabGym:
> py -3.10

>>> from LabGym import __main__
>>> __main__.main()
If you use pipx, from step #6:
Install
pipxby following these instructions.To test your installation of
pipx, close and reopen your terminal window, then type the following command:> pipx --version 1.4.3
If the version number prints successfully, then your installation is working properly. Otherwise, try running the
pipx ensurepathcommand again.Install LabGym via
pipx.> pipx install --python 3.10 LabGym
If you want to use LabGym Detector function:
8.1. Install Detectron2 in LabGym’s virtual environment.
> pipx runpip LabGym install git+https://github.com/facebookresearch/detectron2.git
8.2. Install PyTorch v2.0.1 with CUDA v11.8 in LabGym’s virtual environment.
> pipx inject --index-url https://download.pytorch.org/whl/cu118 LabGym torch==2.0.1 torchvision==0.15.2
If you are using LabGym without a GPU, use the following command instead.
> pipx inject --index-url https://download.pytorch.org/whl/cpu LabGym torch==2.0.1 torchvision==0.15.2
Launch LabGym:
> LabGym
The GUI will take a few minutes to start up during the first launch. If the LabGym GUI shows up, you have successfully installed LabGym!